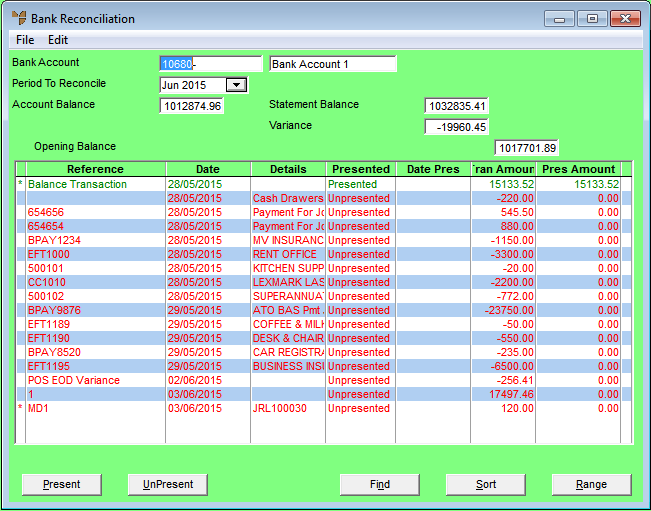
The Bank Reconciliation screen shows the default Bank Account with a listing of all unpresented cheques and deposits for that bank account.
|
|

|
Technical Tip Transactions marked with an asterisk in the first column are consolidated entries. This means they contain multiple transactions. To turn consolidation on or off, refer to "Bank Reconciliation - Edit - Enable Consolidating". |
|
|
Field |
Value |
|---|---|---|
|
|
Bank Account |
Micronet displays the default bank account. If you want to select a different bank account to reconcile, delete the default bank account and press the Enter key. Micronet displays a list of accounts to choose from. These are GL accounts that have been setup with an Account Position of Bank (for more information, refer to "File - GL Accounts - GL Account"). Every GL account with this position must be reconciled and presented transactions cleared on a regular basis. |
|
|
Period to Reconcile |
Select the GL period to reconcile the bank statement against. |
|
|
Account Balance |
Micronet displays the balance of the selected account. |
|
|
Statement Balance |
Micronet updates this field as you present (or unpresent) the listed transactions. When you have finished the Bank Reconciliation, always confirm that the Statement Balance equals the closing balance on your bank statement. |
|
|
Variance |
Micronet displays the difference between the Account Balance and the Statement Balance. |
| Opening Balance |
When starting the Bank Reconciliation, always confirm that the Opening Balance and the Statement Balance are the same. |